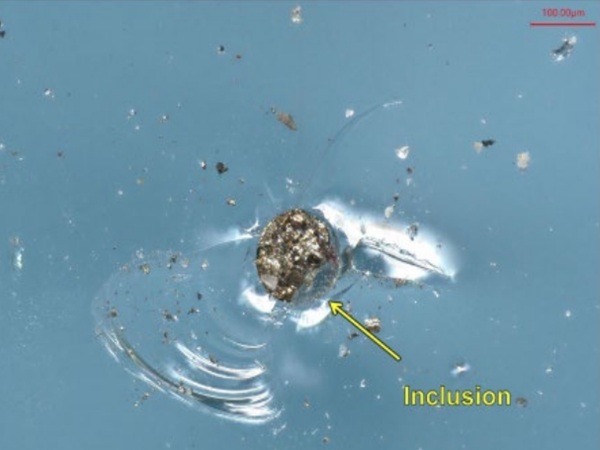
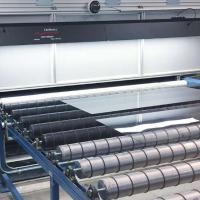
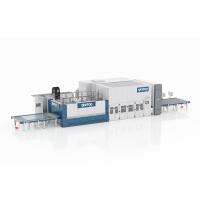
Additionally, there are often capacity bottlenecks at the tempered glass – as well as at the heat soak furnace. Glass defects and contamination will mean that a high-quality finished product cannot be delivered. Such defects must be avoided at all costs at the beginning of the value creation chain. Some companies try to minimize this problem by using manual inspection at the entrance to the furnace.
However, this method is unreliable, since the staff doing the inspection also have to load or unload glass and may not have the right lighting. Furthermore, horizontal glass surfaces are always difficult to examine and when inspections are carried out manually, there is the common problem of limited reliability due to fatigue or low motivation of the staff performing the inspection.
An examination location such as this also has the dis-advantage that a glass that has been removed due to defects cannot be replaced immediately, leading to the furnace not being used to full capacity – and, in the worst case scenario, to customers not receiving deliveries on time. A state of the art vision system is today able to cut quality relevant losings with convincing results and even allows the reallocation of human inspectors for other assignments.
In today’s glass finishing business, a sheet of security glass refined over the entire process chain only to be discarded at the end due to, say, a bubble or a scratch simply cannot be allowed. Not to mention the consequences if the glass is then returned by the customer! Visual defects – scratches, contamination, .. – can in principle occur at any position in the processing chain, from glass cutting to edging and drilling to hardening and the heat soak test. Visual inspection after each processing step would of course be best, but this is both prohibitively expensive and unrealistic. But what is the best place in the process chain to install automated visual inspection to reliably check for the required quality and provide the greatest benefit?
The end of the chain is the typical answer, i.e. after the toughening furnace, so that the quality sent to the customer is 100% guaranteed. However, on further consideration it always turns out that the better position would actually be before the hardening furnace. Firstly because the number of defects which can occur in the furnace itself is relatively low and secondly because refining in the furnace is highly cost-intensive. Other installation locations seldom come into question, as clean glass is a fundamental requirement for inspection, and washing machines are only present after edging or drilling.
Implementing quality control directly after these processing steps results in the following important added organizational advantages for the tempered glass manufacturer, in addition to enormously energy savings at the furnace:
• Rapid re-processing of defective glass
• And the furnace is always used to full capacity as a result
• Recurring defects are remedied before large quantities of glass are pre-processed
• Dirty glass can still be “saved” through manual cleaning
• Optimized production processes despite internal rejects
• High delivery reliability with regard to both quality and delivery date
Today’s Quality requirements
Today’s requirements of visual glass quality are described in detail in several official guidelines, which are published in most countries by the appropriate organisation or institute. These country specific guidelines are mainly similar to each other and vary only in minor details - compare for example the French Cekal guideline with the German Hadamar guideline. Usually the glass manufacturers use these official quality specifications as a base to define the quality of the glass they supply.
But customers frequently complain about defects that are explicitly smaller than they are defined in the specification! Due to these complaints the security glass manufacturer supply expensive replacements in order not to lose their customers.
Requirement profile for an automated inspection
Because glass is never completely defect free a substantial premise of an automatic inspection system is a flexible usage of the real quality requirements and not stopping each glass pane because of minor glass defects. To reach this flexibility for certain defects, e.g. scratches, bubbles, dirt ..., the acceptable defect size and defect quantity must be given accurately by the Quality manager. Furthermore it must be possible to compare easily the result of the automatic control with the glass itself, to gain the necessary transparency and confidence into the efficiency of the system results. Other demands like:
• no productivity losses
• handling all varying manufacturing speeds up to 50m/min
• automatic recognition of glass sizes and glass shapes
• handling of bore holes or cut-outs
• no influence of the coating on the control results
• insensitive to typical harsh industrial environments
...are likewise important.
Beyond it the everyday business requires an obtainable quality inspection which can be adapted in detail to different customers or to different types of glass. Thus it should be able to differentiate the grade of control needed for say a private household with need of strict quality specifications, and those perhaps less stringent for a public establishment.
Quality-Scanner-PG

For such specific process requirements the company Viprotron has developed a flexible automatic visual inspection solution - Quality-Scanner-PG. Together with the newest generation of intelligent CCD-cameras and an intuitive Windows based user interface, the Quality-Scanner-PG takes charge of a reliable In-Line quality control. Directly integrated into the production process of pre-processed glass, this high performance system allows to guarantee a consistent and reproducible quality of the glass independent of human motivation and abilities. Simultaneously a detailed documentation and archiving of the quality is achieved, which allows to prove and print out the exact inspection details of a specific glass unit after even several months.
The Quality-Scanner-PG is completely integrated into the production line after the washing machine and it scans every single glass pane at all transportation speeds up to 50m/min and more. While scanning a glass pane the system is already detecting the defects on the glass. These defects are classified in real time and via comparison with the demanded quality specifications the accept/reject evaluation for the glass will be accomplished.

Without productivity losses the Quality-Scanner-IG stops only rejectable glass or gives a warning signal before the glass will be further assembled. The result of each pane will be simultaneously visualized in detail on a separate screen by displaying all defects - with their class dependent symbols – at their precise calculated positions on the glass pane.
All glass panes are represented together with the demanded quality zones in a coordinate system. If the operator clicks on the defect symbol on the screen, he receives the camera image of the defect and its size. With this precise visualization the defects on the glass can be easily located within seconds.
All visual defects like e.g. bubbles, scratches, stones, coating defects, tin, dirt, finger prints, etc. larger than 0,5 mm² will be easily detected by the Quality-Scanner-PG . Furthermore the tempered glass manufacturer is able to accurately define which type of defect with which defect size and quantity should lead to a reject - Figure 5. Also a distinction of the defect location, e.g. edge and main zone is available in the system software to define an adequate reject case. Thereto the supervisor will be supported by a user friendly Windows interface which allows to define and illustrate the exact quality settings according to the official guidelines or the customer specific requirements.

All quality settings can be stored under separate names, to allow individual settings depending on the specification of the final customer, e.g. schools or private house owners. During production these settings will be either loaded automatically through a communication with the line control or manually by the operator.

The example in illustrates a shaped glass, which contains one short hair scratch in the main zone at 580/120mm and two smaller dots in the edge zone. Despite these defects the glass was classified as acceptable (green markings) - due to the given quality requirements. Under the menu option ‘quality parameter set’ a new quality definition can be loaded manually – automated loading is also possible - , if necessary.
Conclusions
By integrating the Quality-Scanner-PG after the glass pre-processing, the production-costs and -time beside expensive customer complaints can obviously be reduced. In addition to this the operators responsible for manual control can be either explicitly relieved or assigned to other tasks within the production. Even a sensible increase in productivity can be achieved by an explicitly reduced internal rejection rate after the furnace. Furthermore, optimizations are possible from the glass cutting and edging up to the handling and the purchasing of the glass after an intensive evaluation of the inspection results.
Further advantages for the tempered glass manufacturer are:
• Reliable detection of visible defects larger than 0,5mm²
• Production with constant quality
• Adaption of the product quality according to specific customer requirements and glass type
• Process and organisation optimisation
• Preventive avoidance of defects e.g. scratches and dirt
• Savings of glass which can be manually cleaned
In addition to the detailed documentation and statistics, further software tools which support the tempered glass manufacturer to improve his productivity with the Quality-Scanner-PG, can be easily added to this technology. Finally the experiences with the integration of the Quality-Scanner-PG demonstrates, that not only the quality of the whole production of tempered glass reaches a higher level, also the productivity and the entire organisation can be obviously improved.
By Mr. Kai Vogel, Dipl.-Ing., Viprotron GmbH
Date: 23 June 2008
The current manufacturing of tempered glass is a complex as well as time- and cost-intensive process. Not only long processing times, but also high energy costs have a significant impact.
 600450
By Mr. Kai Vogel, Dipl.-Ing., Viprotron GmbH
2008-06-23T13:00:00
Optical Quality Control: Pre-Processing Of Tempered Glass
glassonweb.com 
