Date: 12 July 2012
After the introduction of the tin side detector TinCheck as a handheld device, the company is now launching TinCheck Industrial as a consequential further development. Following on from the original TinCheck, which already gives an indication of the level of tin load besides quick, easy and reliable detection of the tin side, the TinCheck Industrial now represents a complete measuring tool for determining the tin load.
This helps glass manufacturers to monitor the quality of the produced glass. Glass processing companies are already benefitting from TinCheck Industrial as they are now able to check the quality of the glass to be processed in terms of usability, and to adjust the process parameters of the tin load accordingly.
Noticeably increased stability of production results for Flintermann
Flintermann Glasveredelungs GmbH & Co. KG is one of the first companies to use TinCheck Industrial in its production.
“My expectations towards the device were exceeded many times over,” says Reinhard Gruber, authorised representative and factory manager of the glass finishing division. “The results are absolutely in accord with my long-term experience in production - the tin value has clear effects on the processing result and must be considered when setting up the processing parameters,” Gruber reports and adds: “If the deviations between the tin values and the values with which the toughened safety glass furnace was calibrated are too large, this will definitely cause cold cracks or hot spots and therefore it will inevitably lead to an increase of reject material”. The tin value also has an extreme impact on the result of glass bending processes, UV-bonding and the painting of glass surfaces, as Reinhard Gruber determined during his extensive tests: “For example, we were able to determine a strong correlation between the tin value and the visual effect of the paint on surfaces painted in pure white”. Since Flintermann started adjusting the production to the tin value of the glass which was measured before the processing using the Bohle device, the production results again have become significantly more stable than before.
Professor Dr.-Ing. Ömer Bucak of the Munich University of Applied Sciences, department Civil Engineering, also confirms that the tin value has a great influence on the properties of glass in construction. As part of an AiF -project which, amongst others, was conducted in cooperation with the company Flintermann, he was impressed with the performance of the TinCheck Industrial. Prof. Dr.-Ing. Bucak is certain that “the use of TinCheck Industrial can contribute to more stable and efficient processes which also enable glass manufacturers and processing companies to set themselves apart from competitors worldwide.”
Stabilisation and increased efficiency due to innovative measuring tools
“The aim of the Bohle Group is to make a lasting contribution to the stabilisation and increased efficiency of glass production and processing as well as to improve the quality of the glass products themselves. With use of our innovative measuring tools,” Dr. Heinrich Ostendarp, CEO of the Bohle AG, explains. “The development of a reliable and robust device for the determination of the tin value was a great challenge indeed. In the end, we were able to achieve highly reliable measuring signals even in cases of disruption such as extraneous light, temperature fluctuations etc. due to the special measuring system as well as various individual visual and electronic developments,” Ostendarp continued.
TinCheck Industrial for integration into production processes
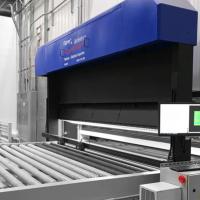
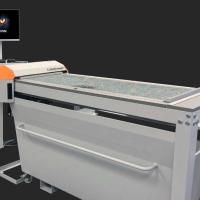
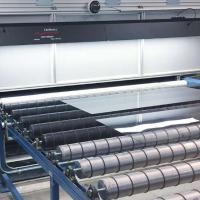
In the first step, Bohle will launch the TinCheck Industrial for integration into production lines. For the determination of the tin side, the sensor can be directly connected to a control system via digital inputs and outputs. It is also possible to connect the sensor to a central computer via a serial interface in order to record and continuously document the value of the tin load. There will be an offline device based on the technology which can be used for applications such as quality assurance processes. In cooperation with PC software, this enables the easy and comfortable measurement of glass samples as well as the archiving of the measuring results.
TinCheck Industrial could soon be standard equipment
The test customer Reinhard Gruber of Flintermann is very enthusiastic about TinCheck Industrial and predicts a great future for the device. Gruber is convinced: “The correlation between the tin value and processing parameters is so obvious that the measuring tool will soon be an essential piece of equipment for every glass finishing company”. Reinhard Gruber also sees potential in other areas: “Glass is becoming an increasingly important element in façade engineering. TinCheck Industrial can make a valuable contribution towards the flawless processing of glass and thus, the improvement of safety“.







Add new comment