A paper was first presented at GPD 2017 by Ingo Stahlkopf, Torsten Czech | Optris GmbH.
Abstract
During the whole process of glass production and further treatment the temperature is one of the most important values to be measured, either directly for production control or for documentation or both of them.
For precise measurement the behavior of glass regarding IR-radiation must be known. There are influences from the ambient area as well as specific emissivity values of different glass types. Therefore, the right type of sensor or camera has to be chosen. In Figure 1 typical emission values for several types of glass are given.
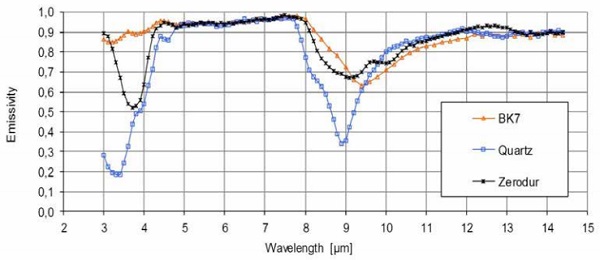
As to see there are two ranges with relatively high emissivity peaks, around 5µm and at 7.9µm. That’s the reason why most pyrometer, line scanners or IR cameras within the glass industry are working with such spectral filters, either at 5 or 7.9µm. The high emissivity in this range means a low amount of reflections from the ambient.
For applications where not the surface temperature but the inner temperature shall be measured much shorter wavelength are needed. This can be the case for example in the float glass industry by measuring the glass in the float bath or behind. Another example is the internal temperature of glass drops within the container glass industry.
Figure 2 gives an example of improper measurement by comparing a long wavelength device which is working from 7,5-13µm with a device working at 7.9µm.
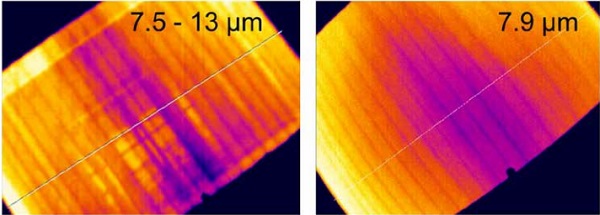
On the right side the image provides a calm temperature profile while on the left side interferences created by reflections, certainly parts of the plant roof, clearly to see. That means in the end the left image would give a much uncertain temperature image compared to the 7.9µm device.
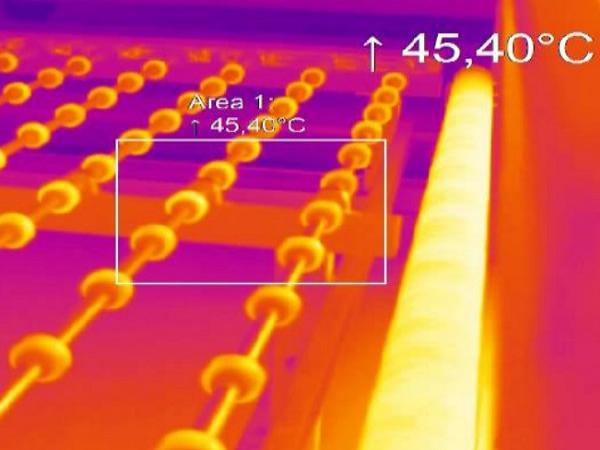
The problem of reflections becomes even worse when coated glass comes into considerations. Due to the typically strongly reduced emissivity by the coating even measurements at specific wavelength cannot be done meaningful. In this case there is only one option left: measurement from below, where is no coating on the glass.
There are two different approaches:
1. Direct measuring with a proper device from below, which means it must be installable and in the best case it is able to measure the whole width of the glass.
2. The second approach is mainly depending on the level of low-emissivity coating. In some cases a solution can be found by using one pyrometer from below as reference pyrometer. The temperature reading of this reference pyrometer can be used as input value to the device which is still measuring from above, in most cases line scanners or IR cameras in line scanner mode. The accuracy of the measurement from the top then is increased.
Next to the emissivity in some applications the glass temperature itself means a challenge regarding precise temperature measurement. Right after the laminating process often the glass temperature is too cold to be measured by devices with 5 or 7.9 µm. In this case only long wavelength devices can be used which again means a higher potential risk of improper measurement due to reflections (Figure 2).
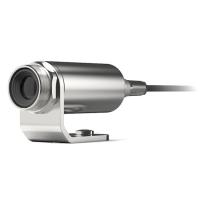
For all kind of noncontact temperature measurement of glass first of all the right choice of the spectral response is important which is mainly driven by the application. Secondly the installation must be done physically in a proper way. This includes the correct distance to ensure a proper field of view and the selection of the right protective accessories for high ambient temperatures. In a lot of installations where coated glass is measured it is still state of the art to use line scanners from top and a reference pyrometer from underneath. The innovative new approach of a scanning temperature measurement from underneath requires modern compact sized IR cameras which are able to operate in linescanning mode. The size of traditional line scanners does not fit in the small space between the tempering furnace and the cooling section. The whole installation effort is also reduced as for devices underneath usually no cooling are required.


